Serve a Model from Databricks Marketplace#
The Databricks marketplace, powered by Delta Sharing, provides an easy way to access many different Generative AI models in Databricks. With just a few clicks, you can add a model to your workspace and then deploy it with Databricks Model Serving. In this notebook, we will briefly cover how to add the OLMo-7b model to your workspace and deploy it with Databricks Model Serving.
Add the model to your workspace#
To get started, navigate to “Playground” under “Machine Learning” in the left navigation menu.
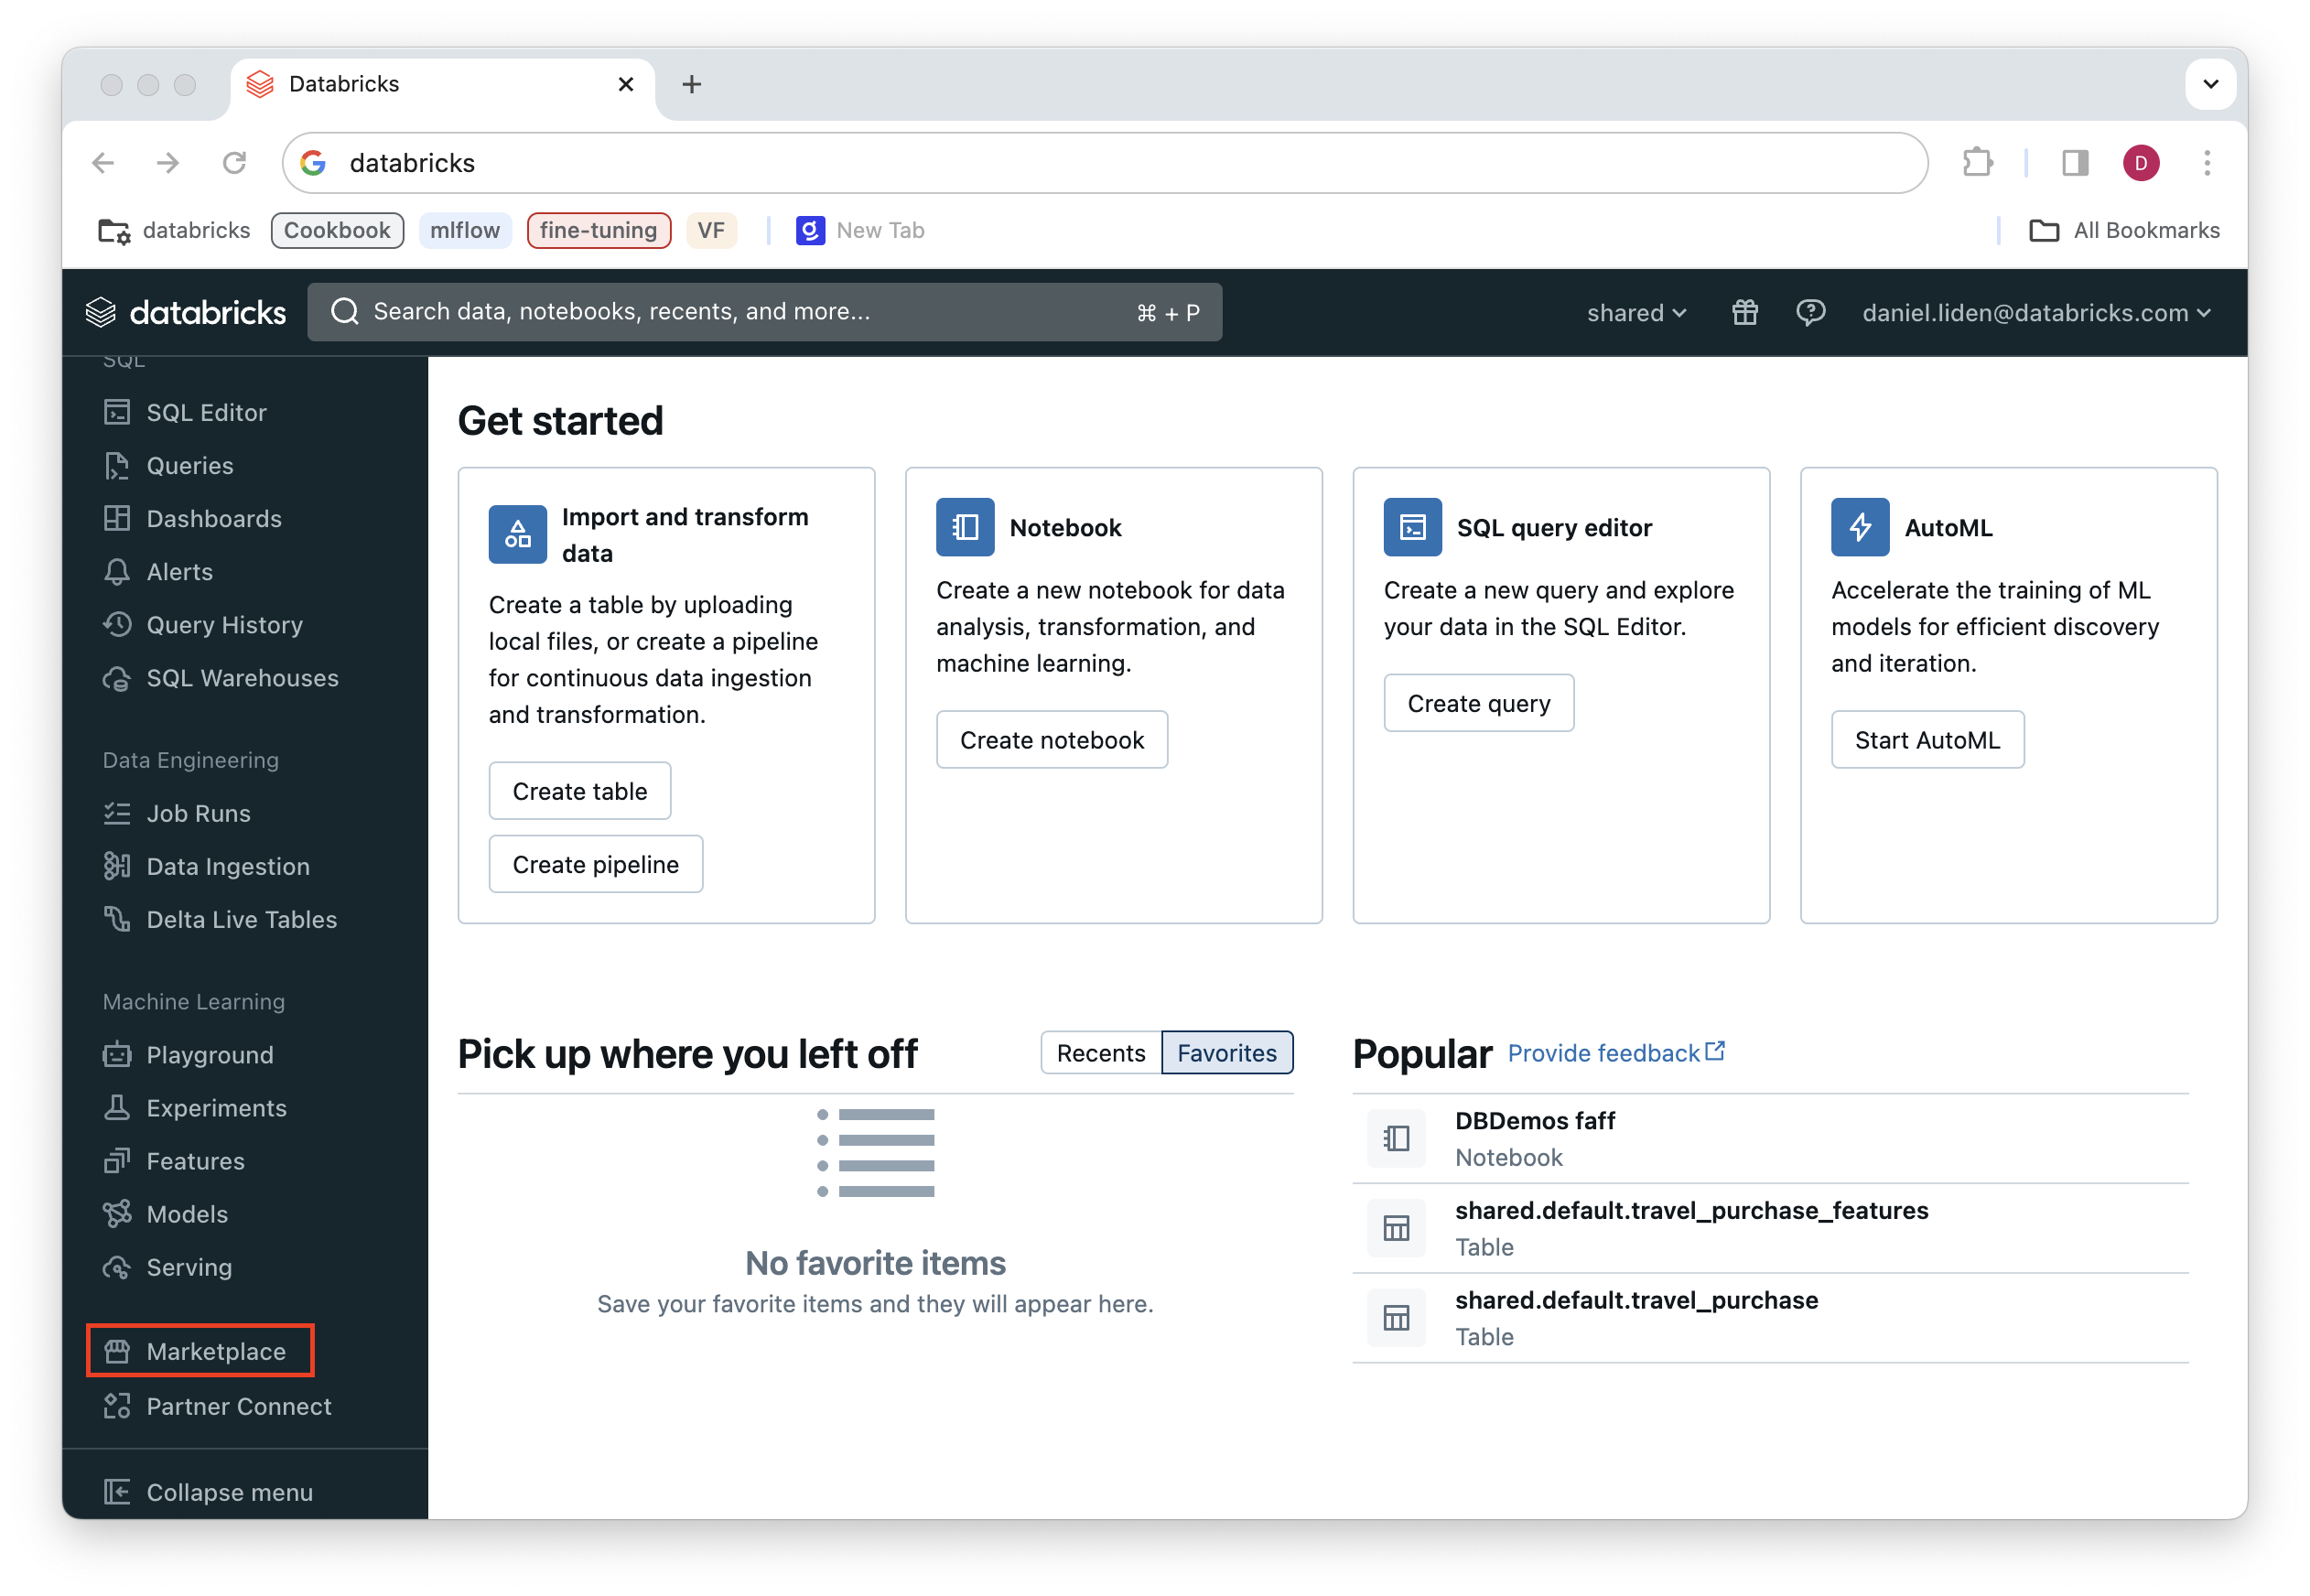
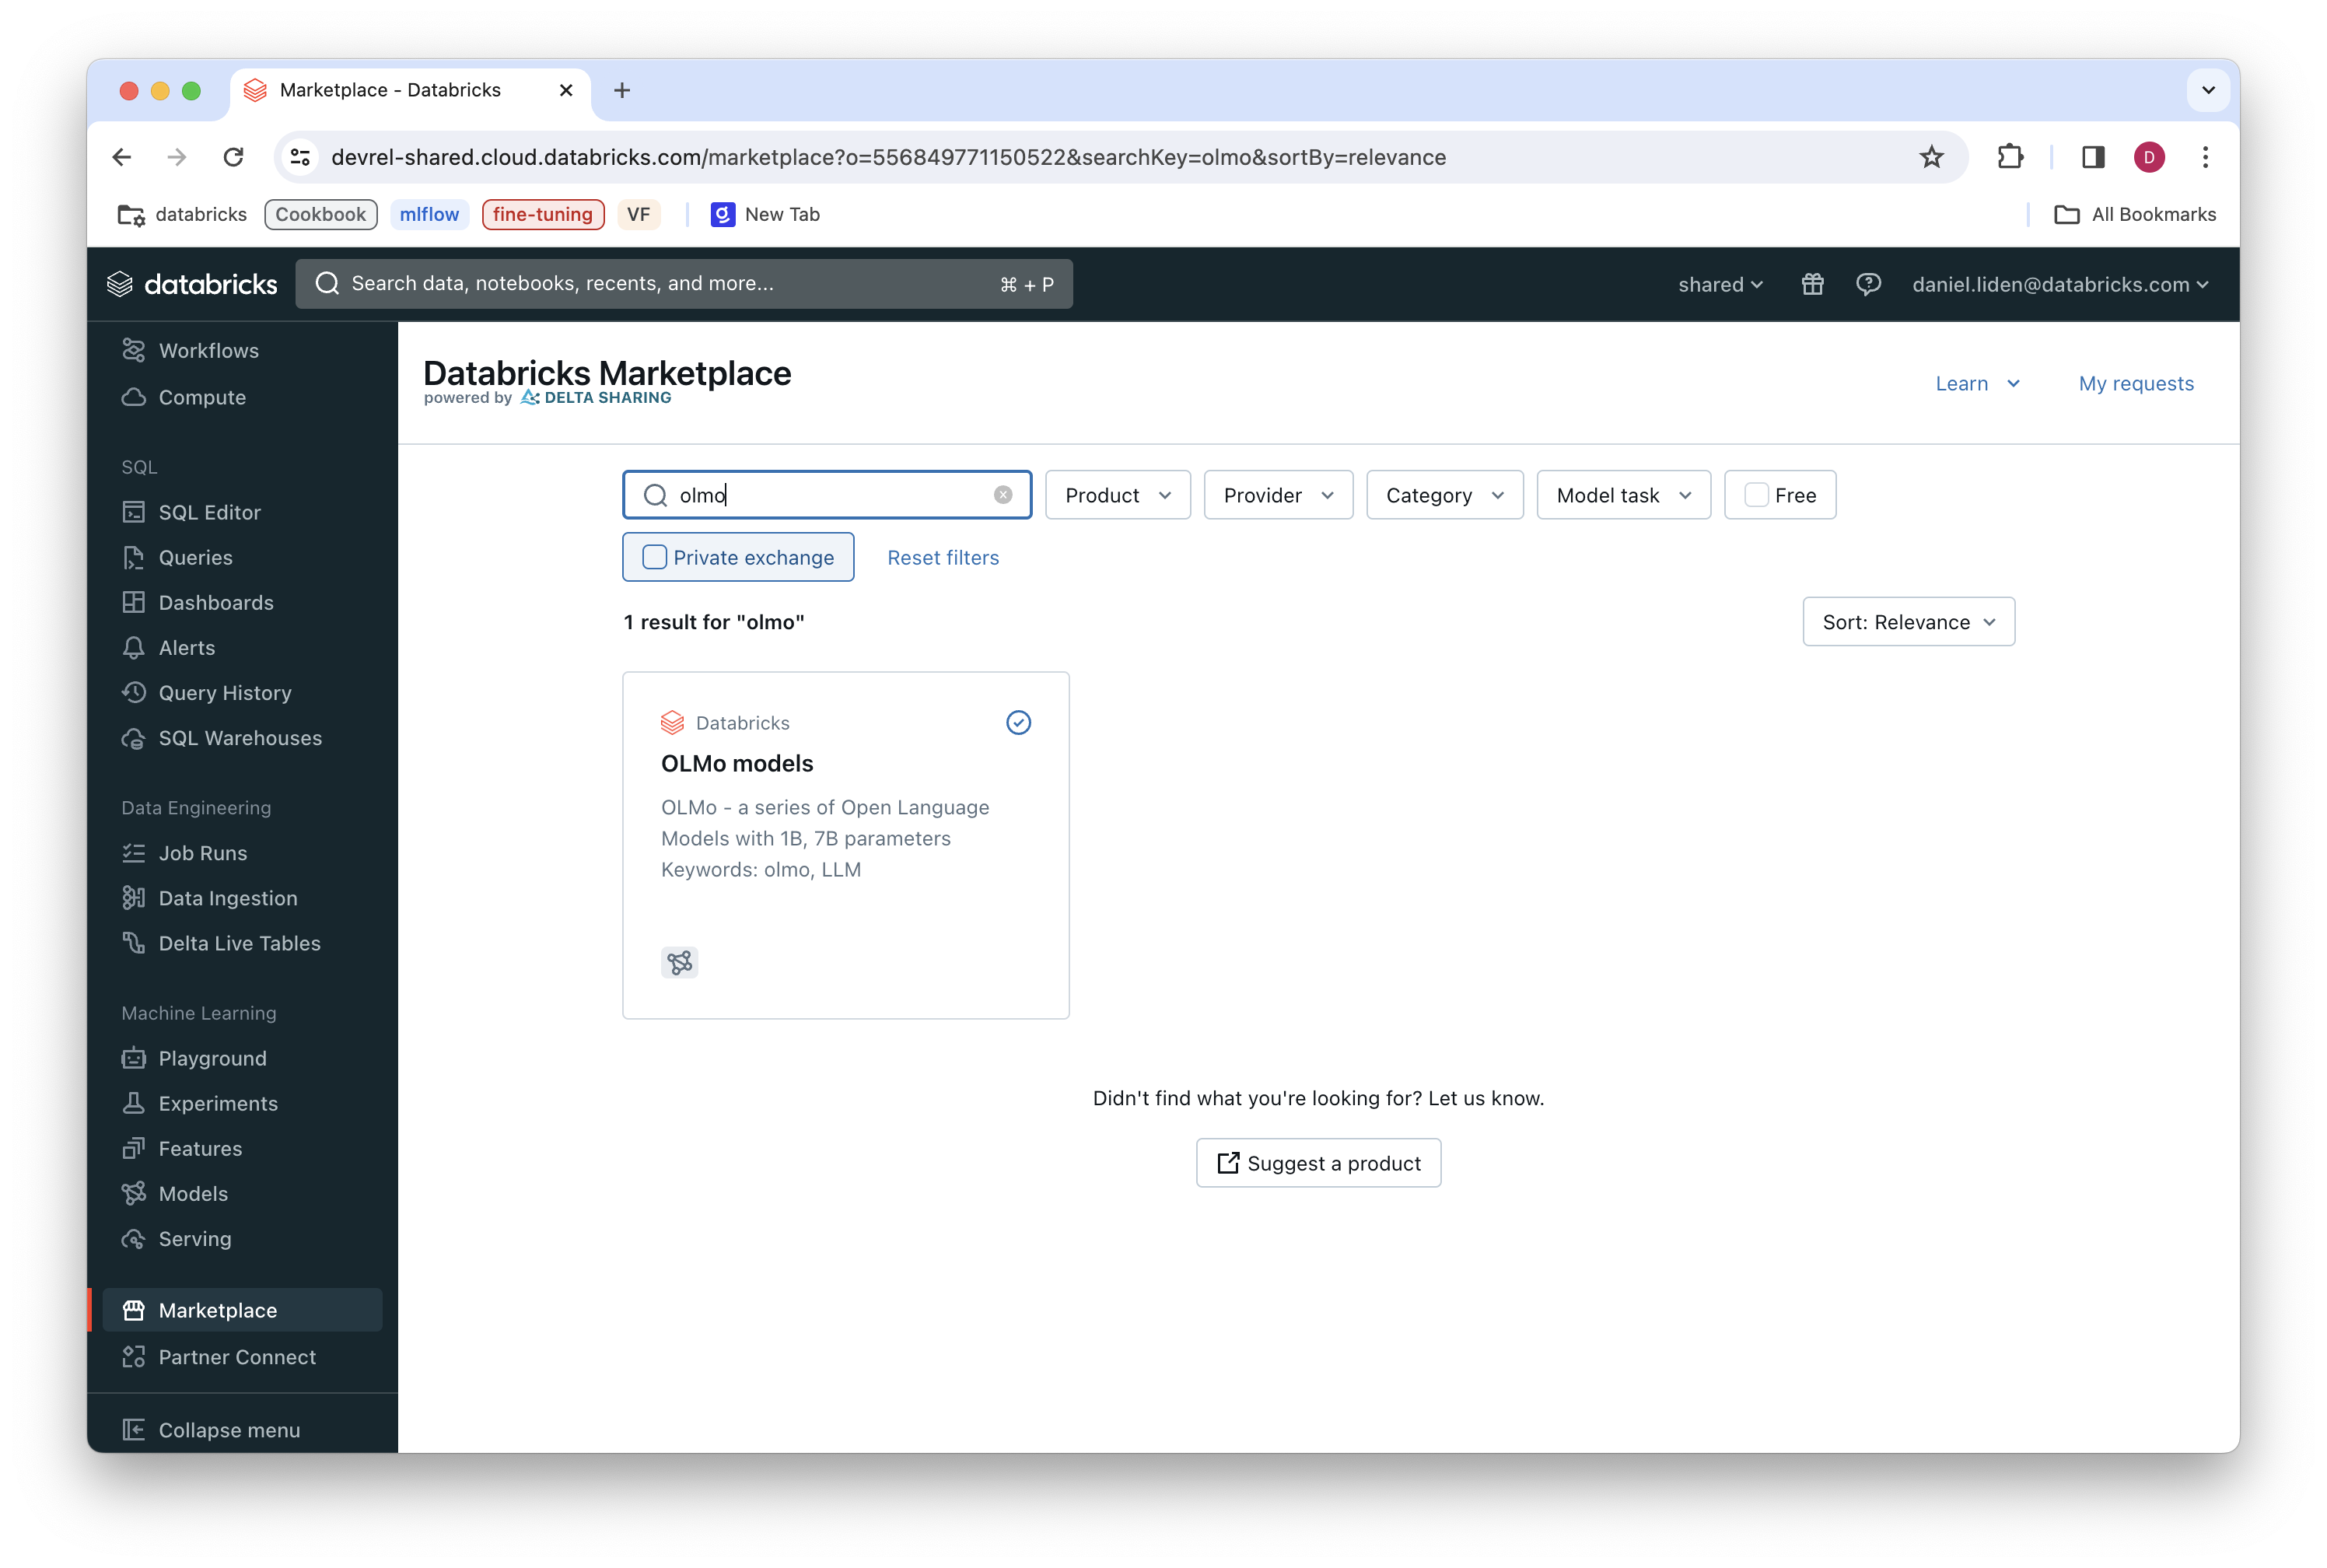
This will lead you to the Databricks Marketplace. From here, you can see all the available models by filtering for “Model” under the “Product” dropdown menu. To find the OLMo models, search for “OLMo” in the search bar.
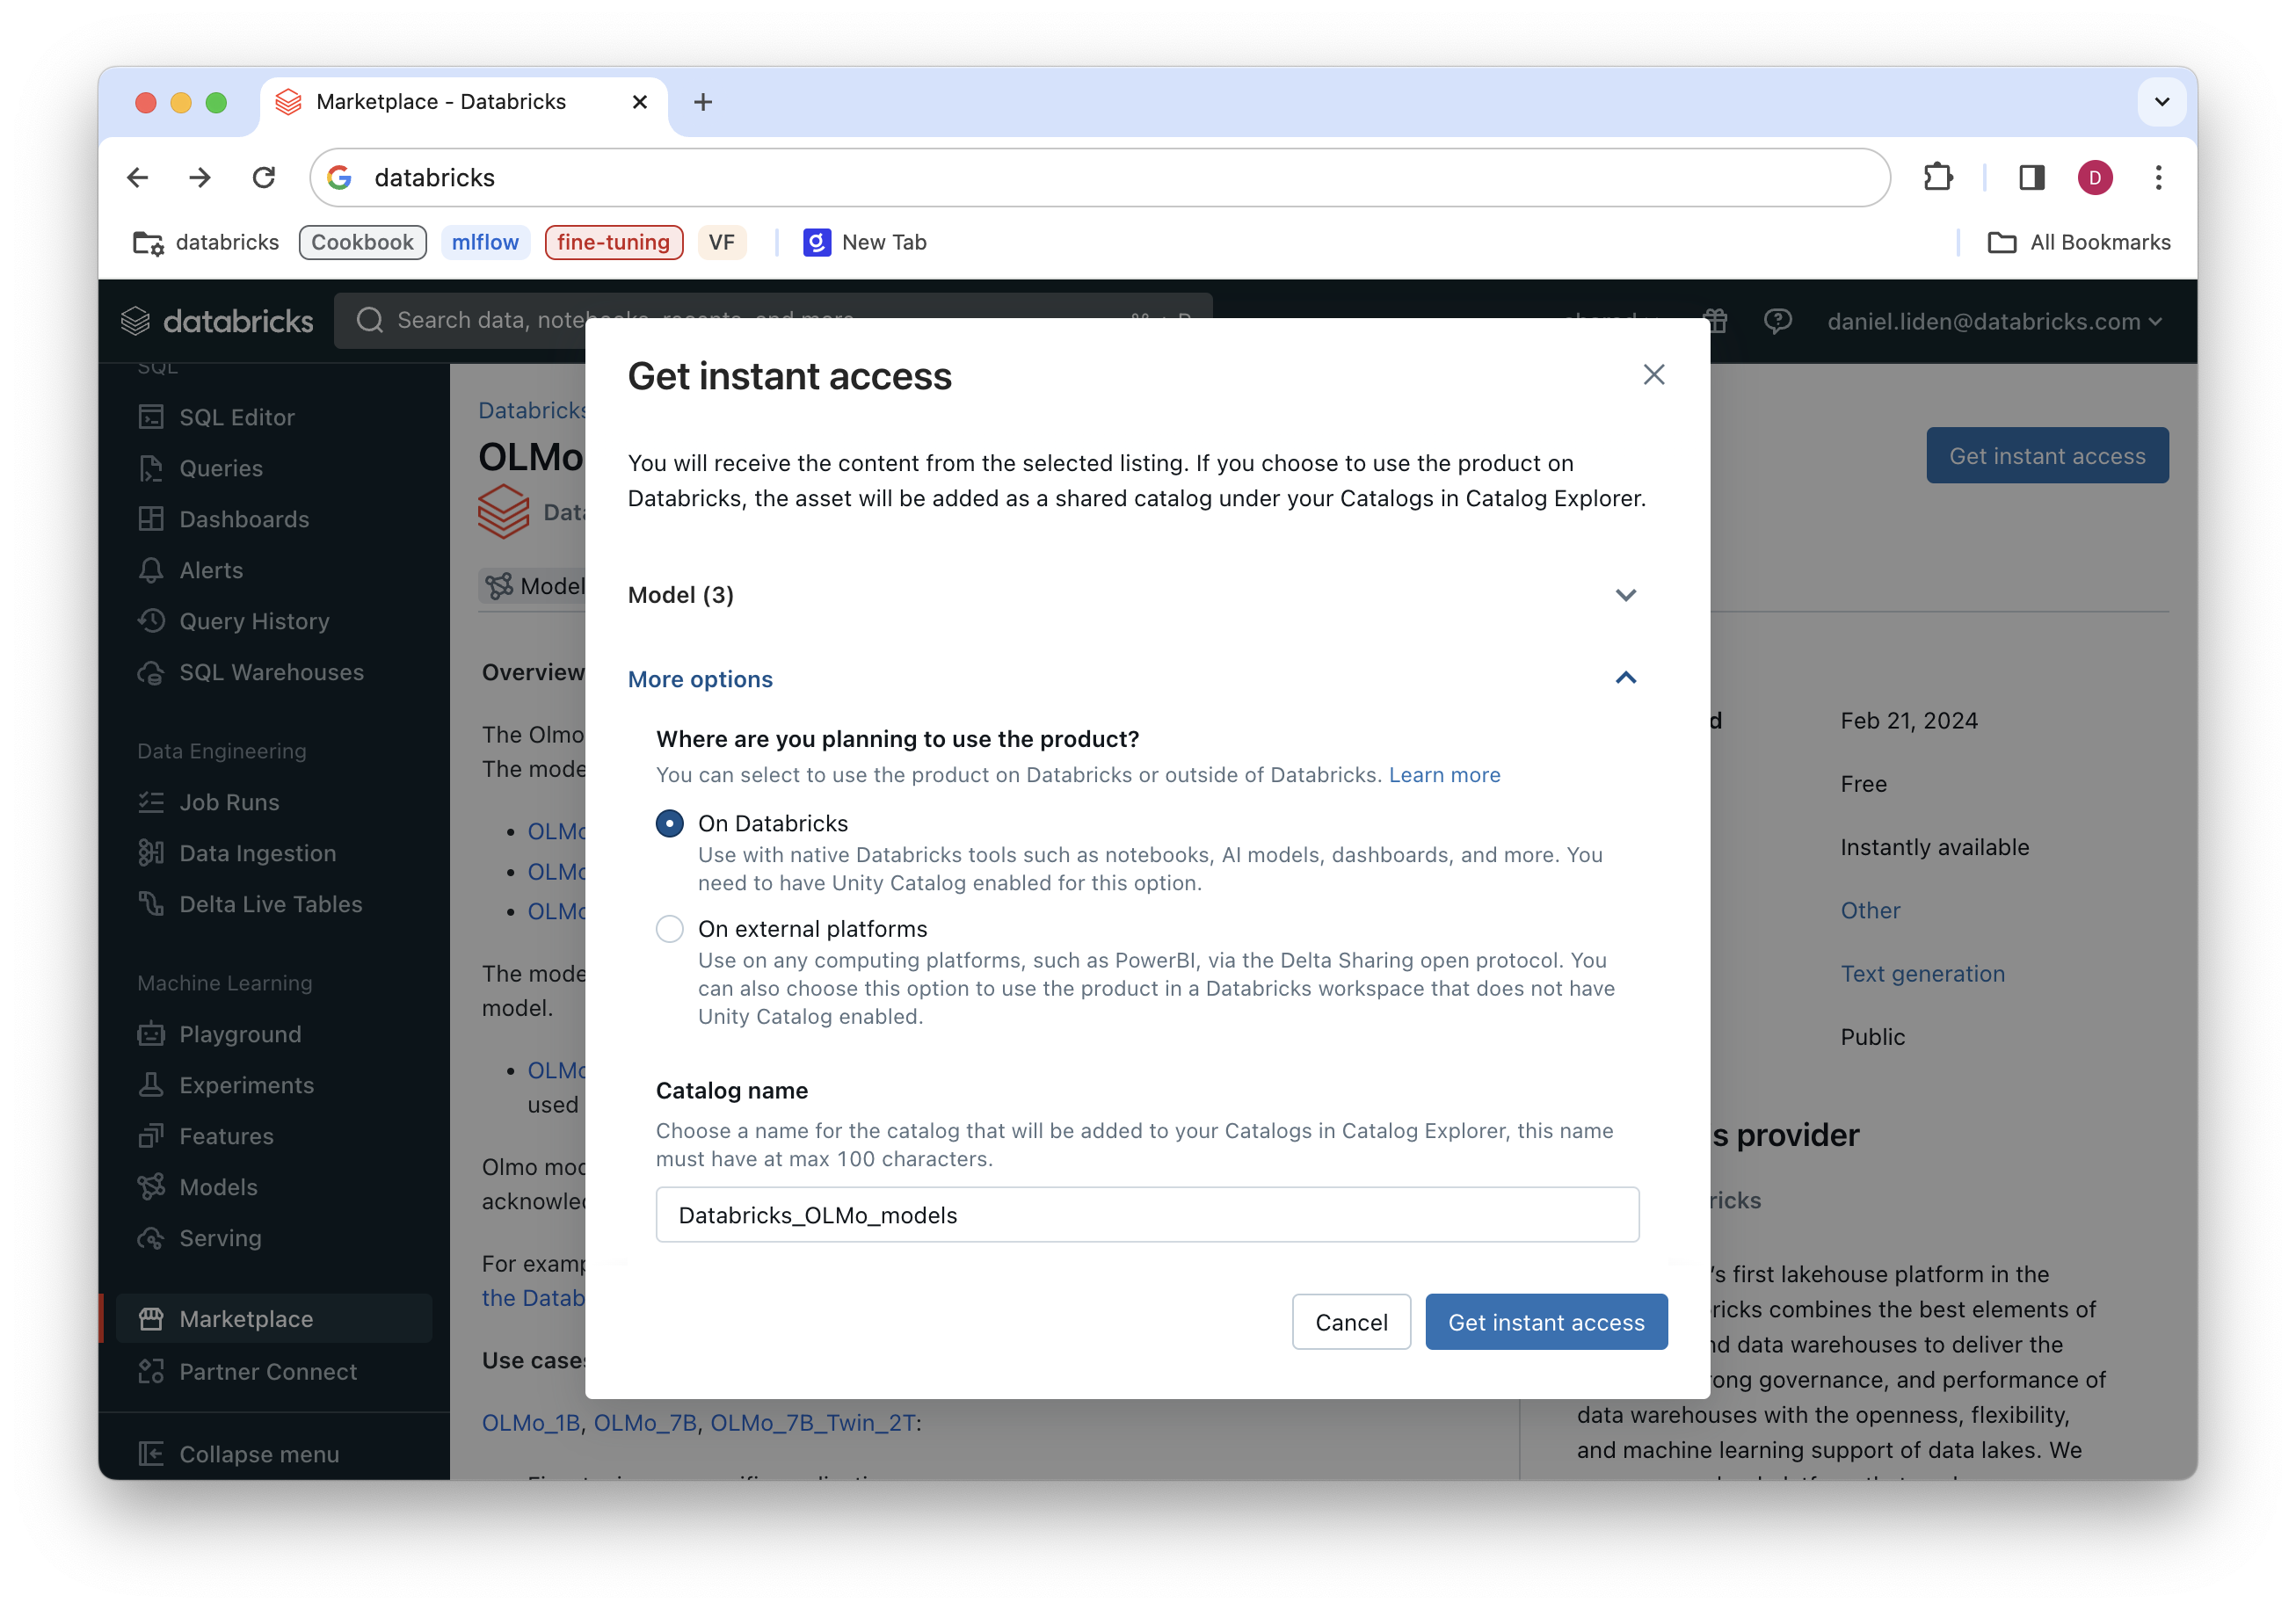
Click on the OLMo model result. The add the models to your workspace, all you need to do is click “Get instant access” and specify the name of the catalog you want created to house the models.
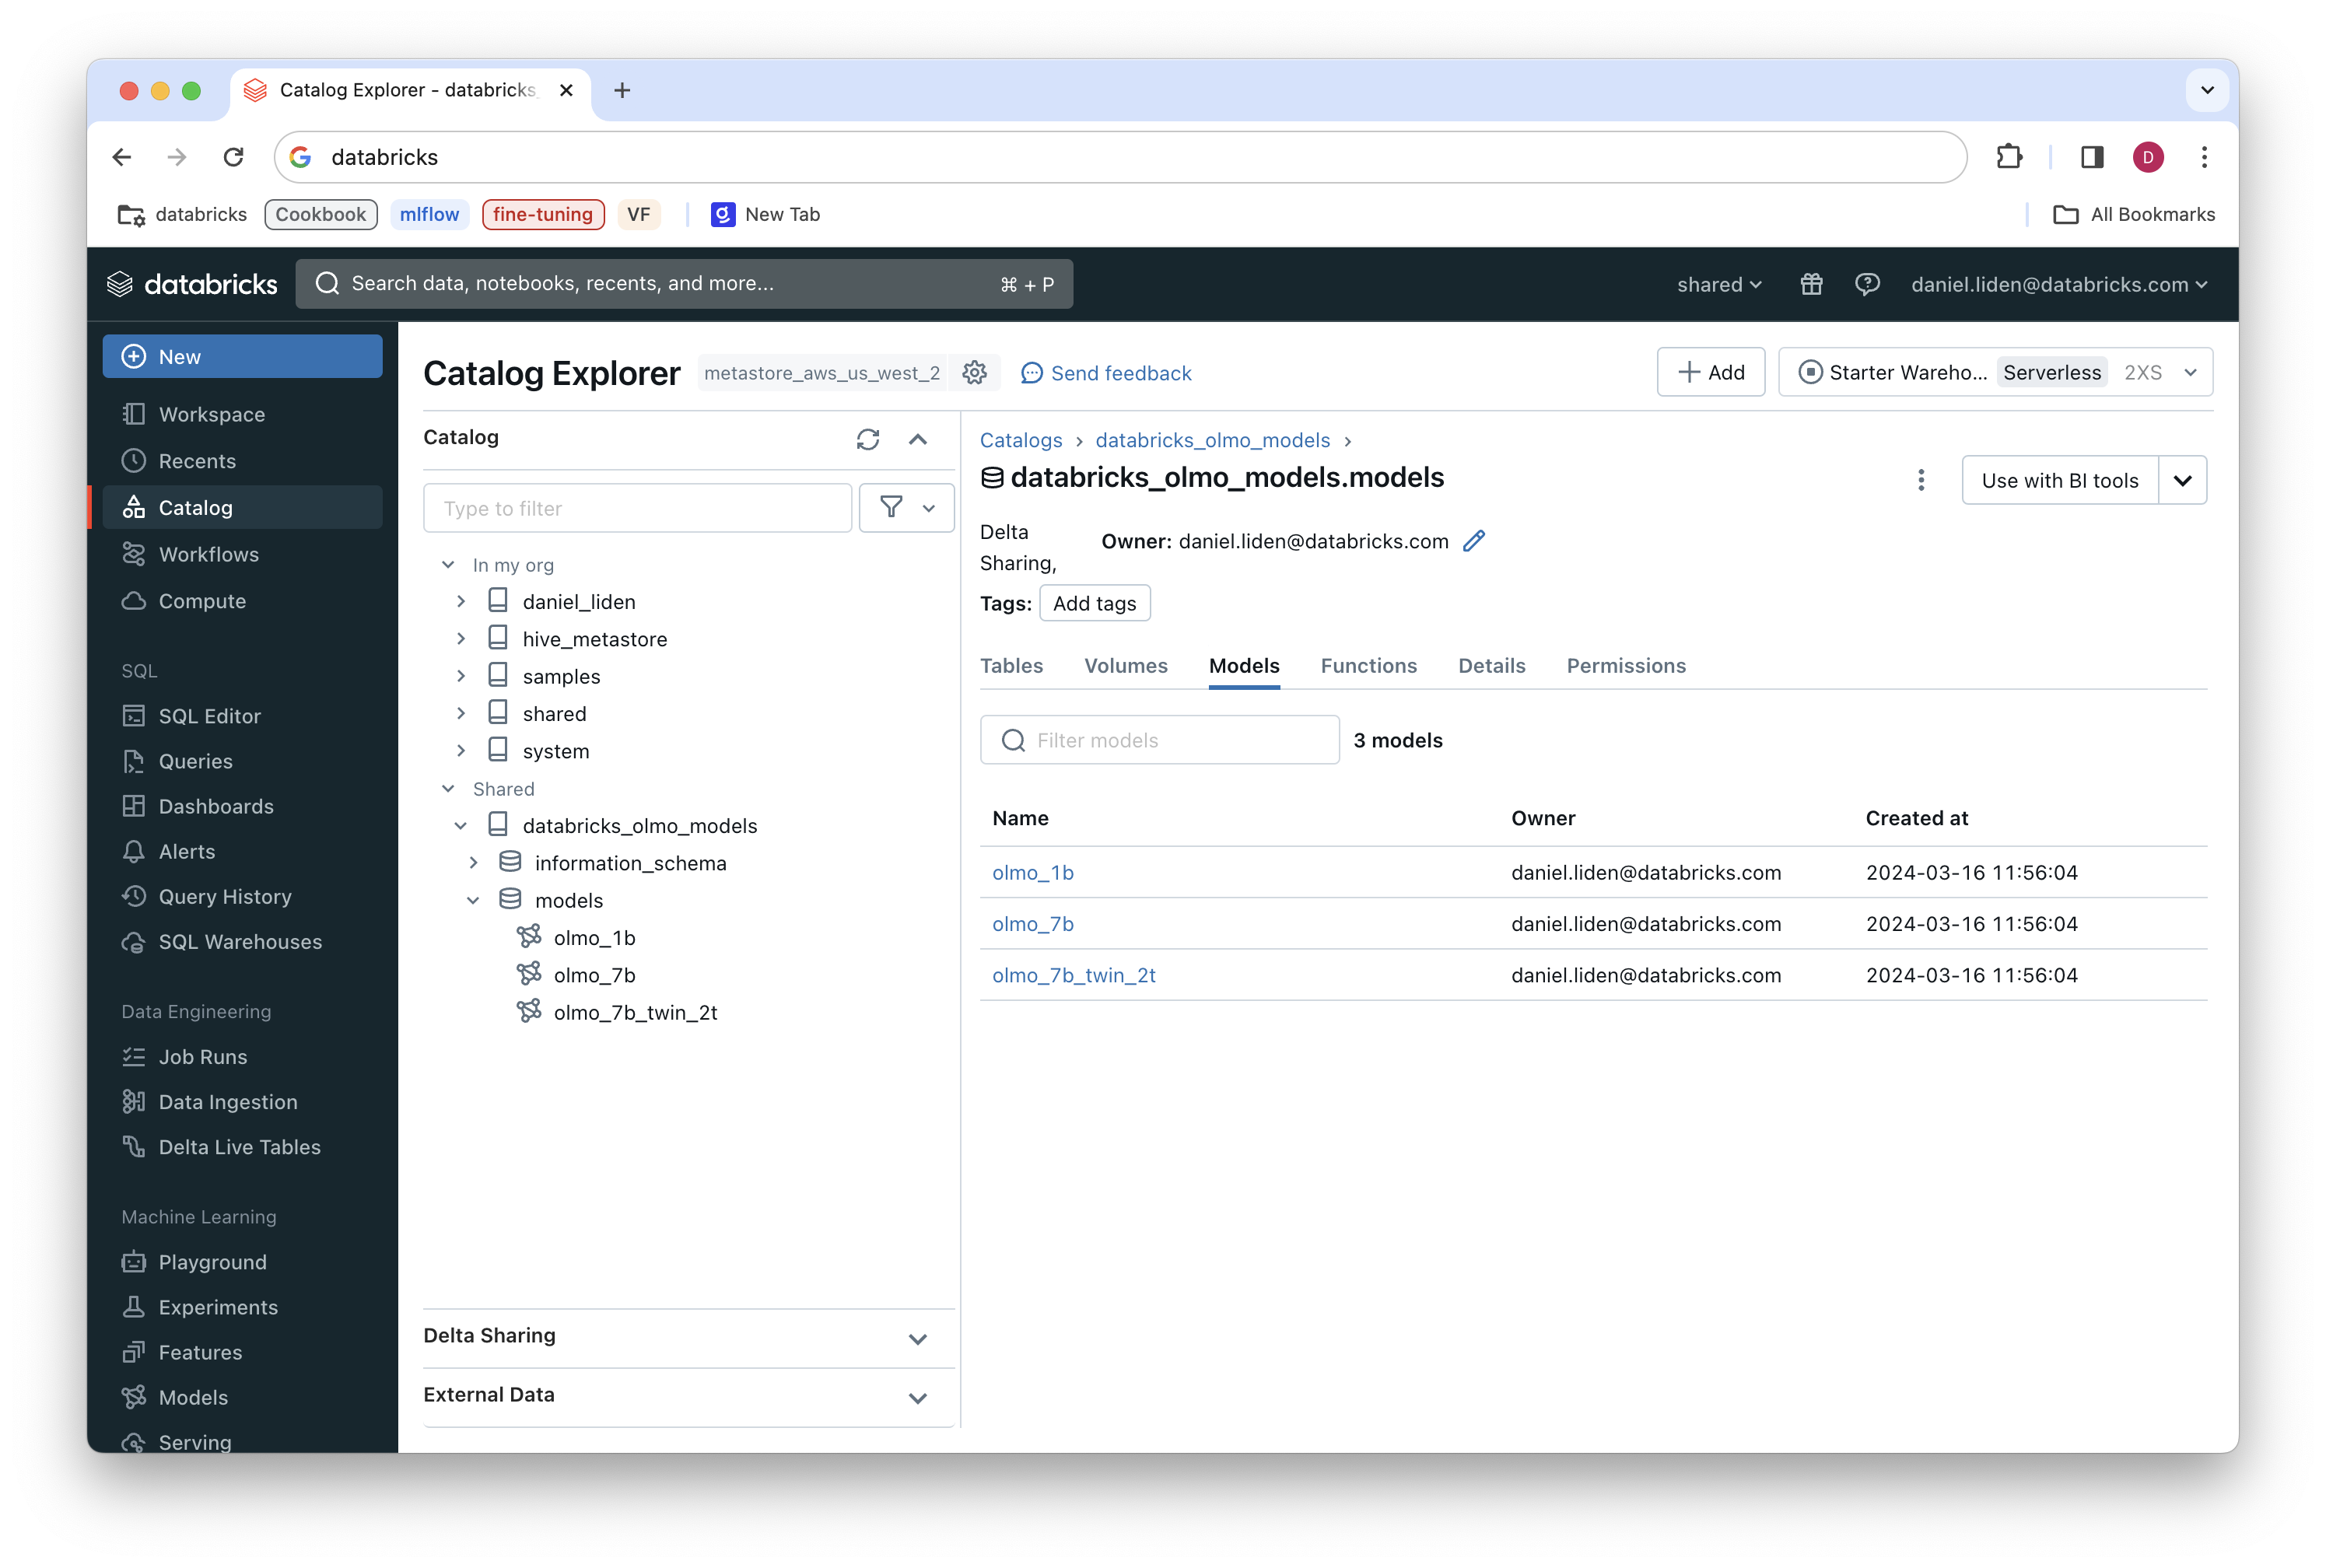
The models will now be available in your workspace. If you’re following along with the OLMo models example, you’ll now have access to:
olmo_1b: the base 1B parameter OLMo modelolmo_7b: the base 7B parameter OLMo modelolmo_7b_twin_2t: The 2T parameter checkpoint of the OLMo 7B model, trained on different hardware than the base model
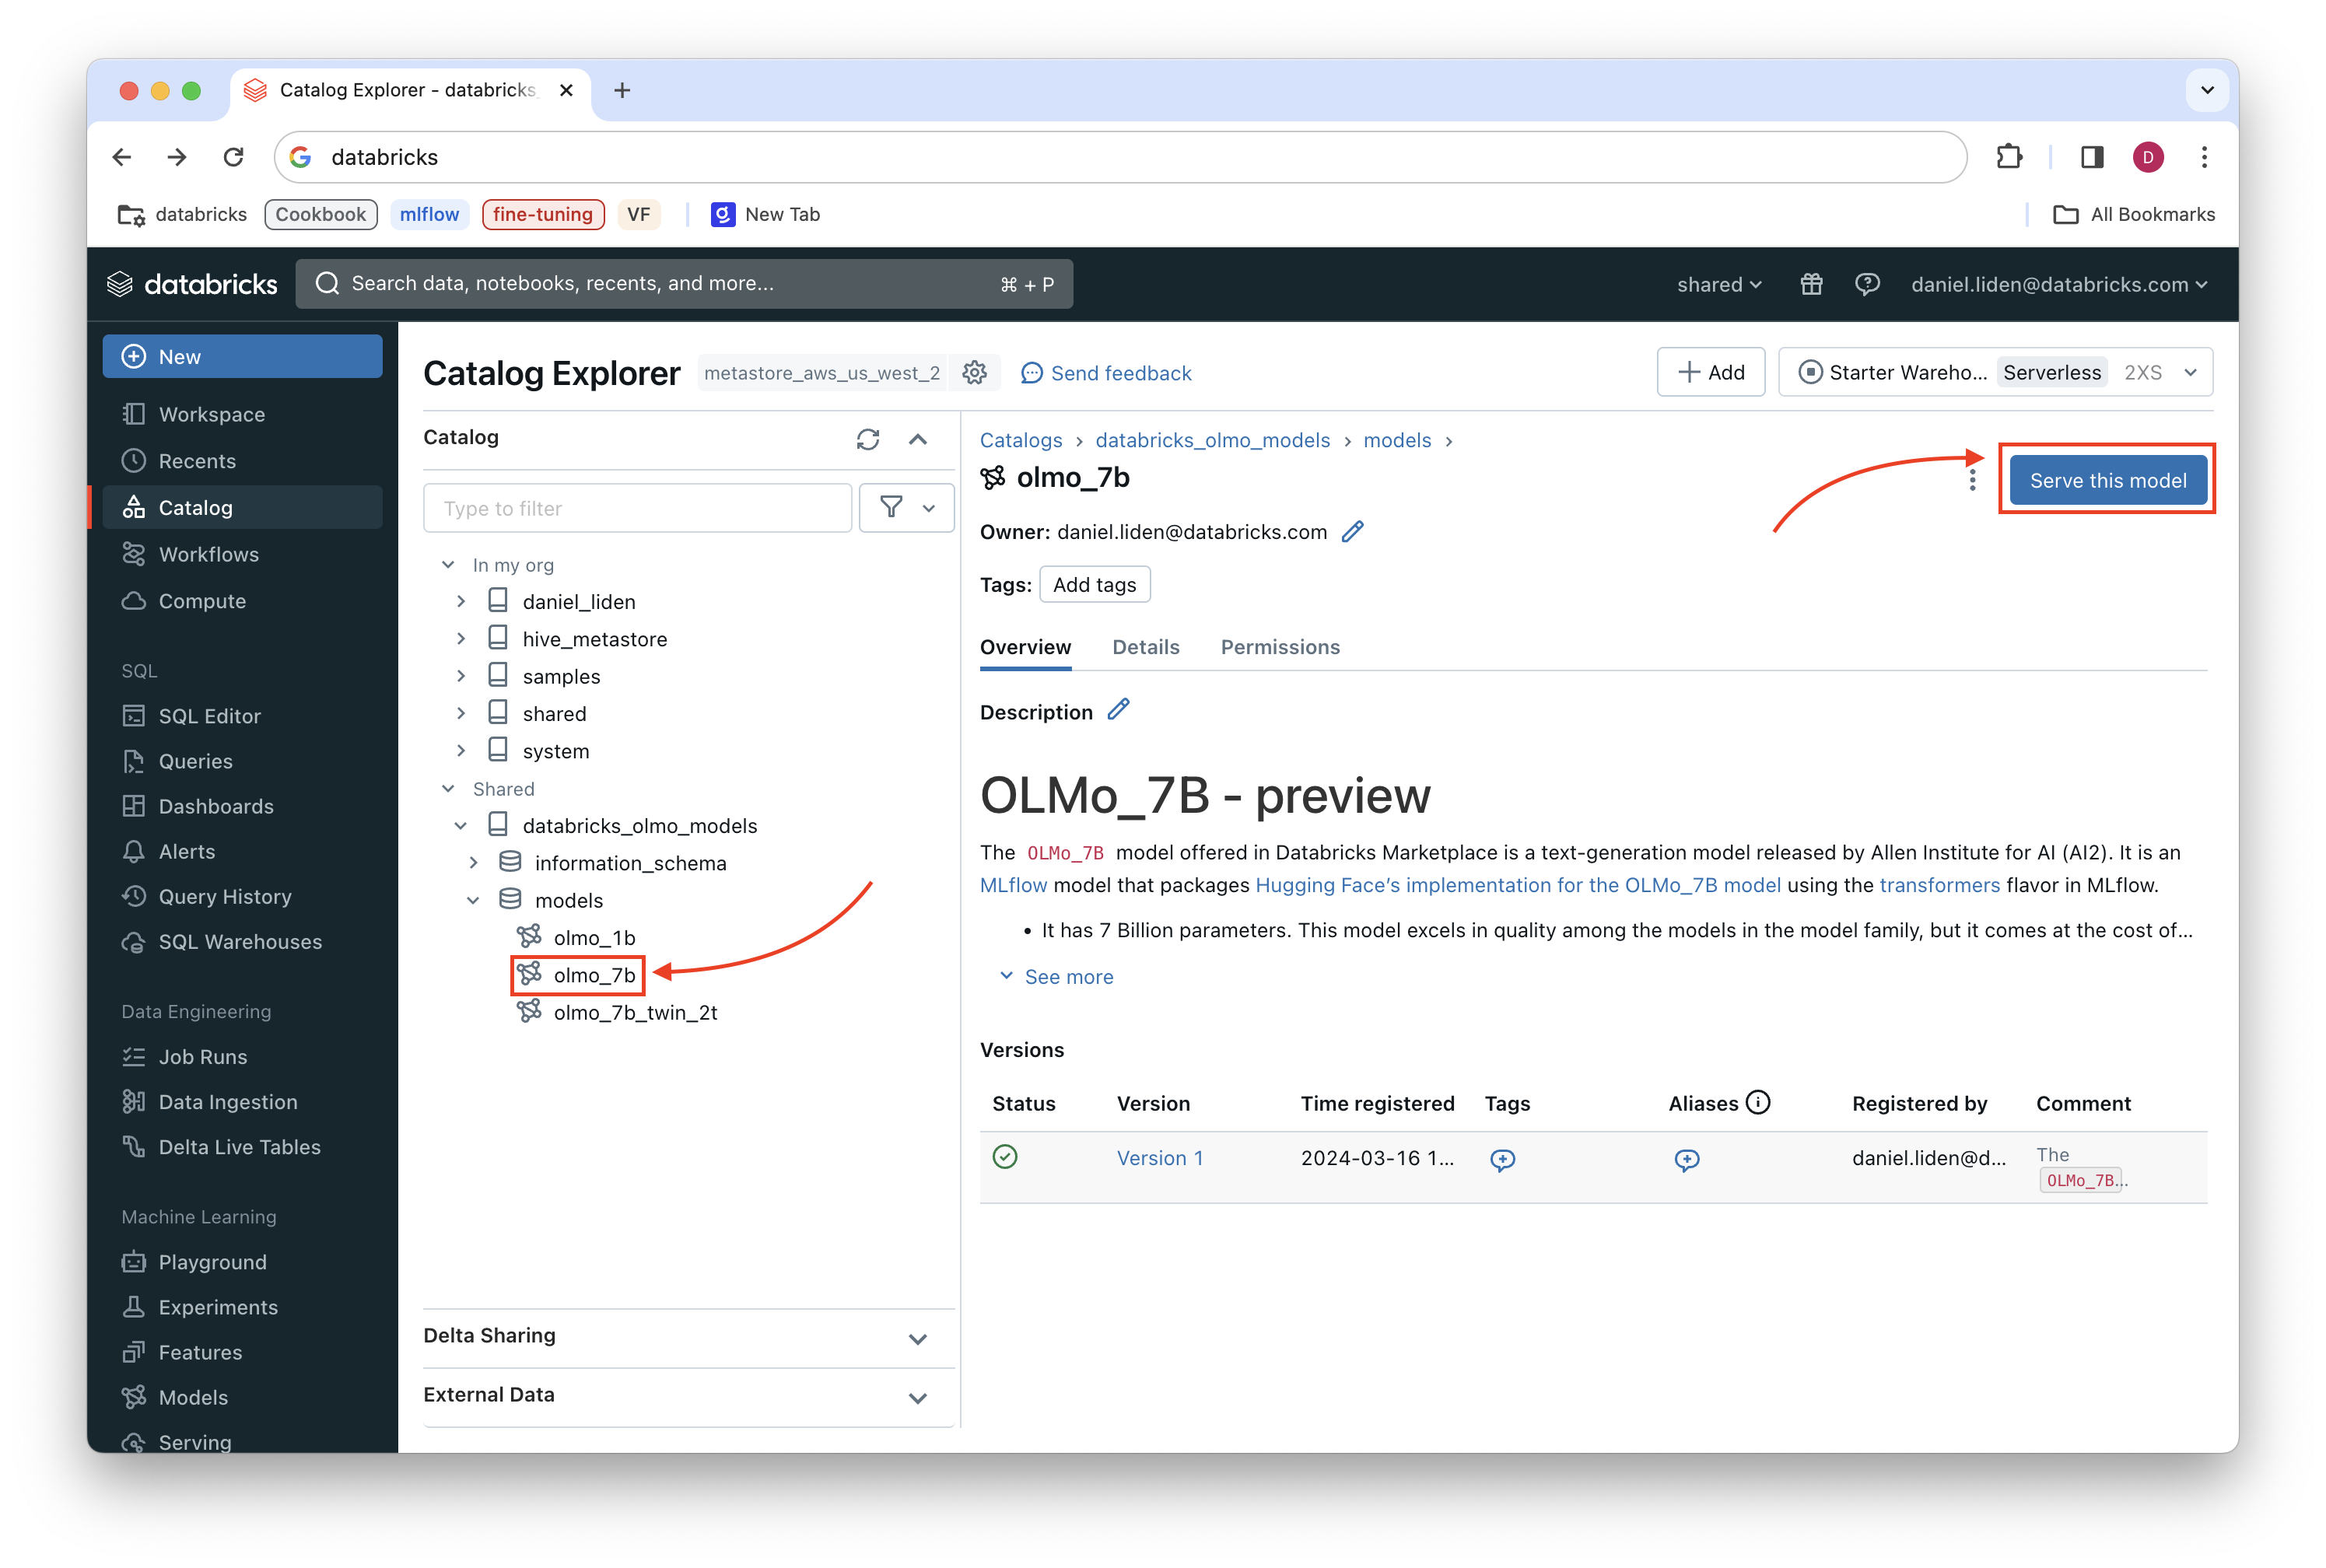
You can see these models by navigating to the catalog explorer and finding the catalog in which you specified the models should be added.
Now that the models are in your workspace, you can deploy them with Databricks Model Serving with just a few clicks.
Deploy the model with Databricks Model Serving#
We will deploy the OLMo 7B model. Navigate to the OLMo-7b model in the catalog explorer and click “Serve this model.”
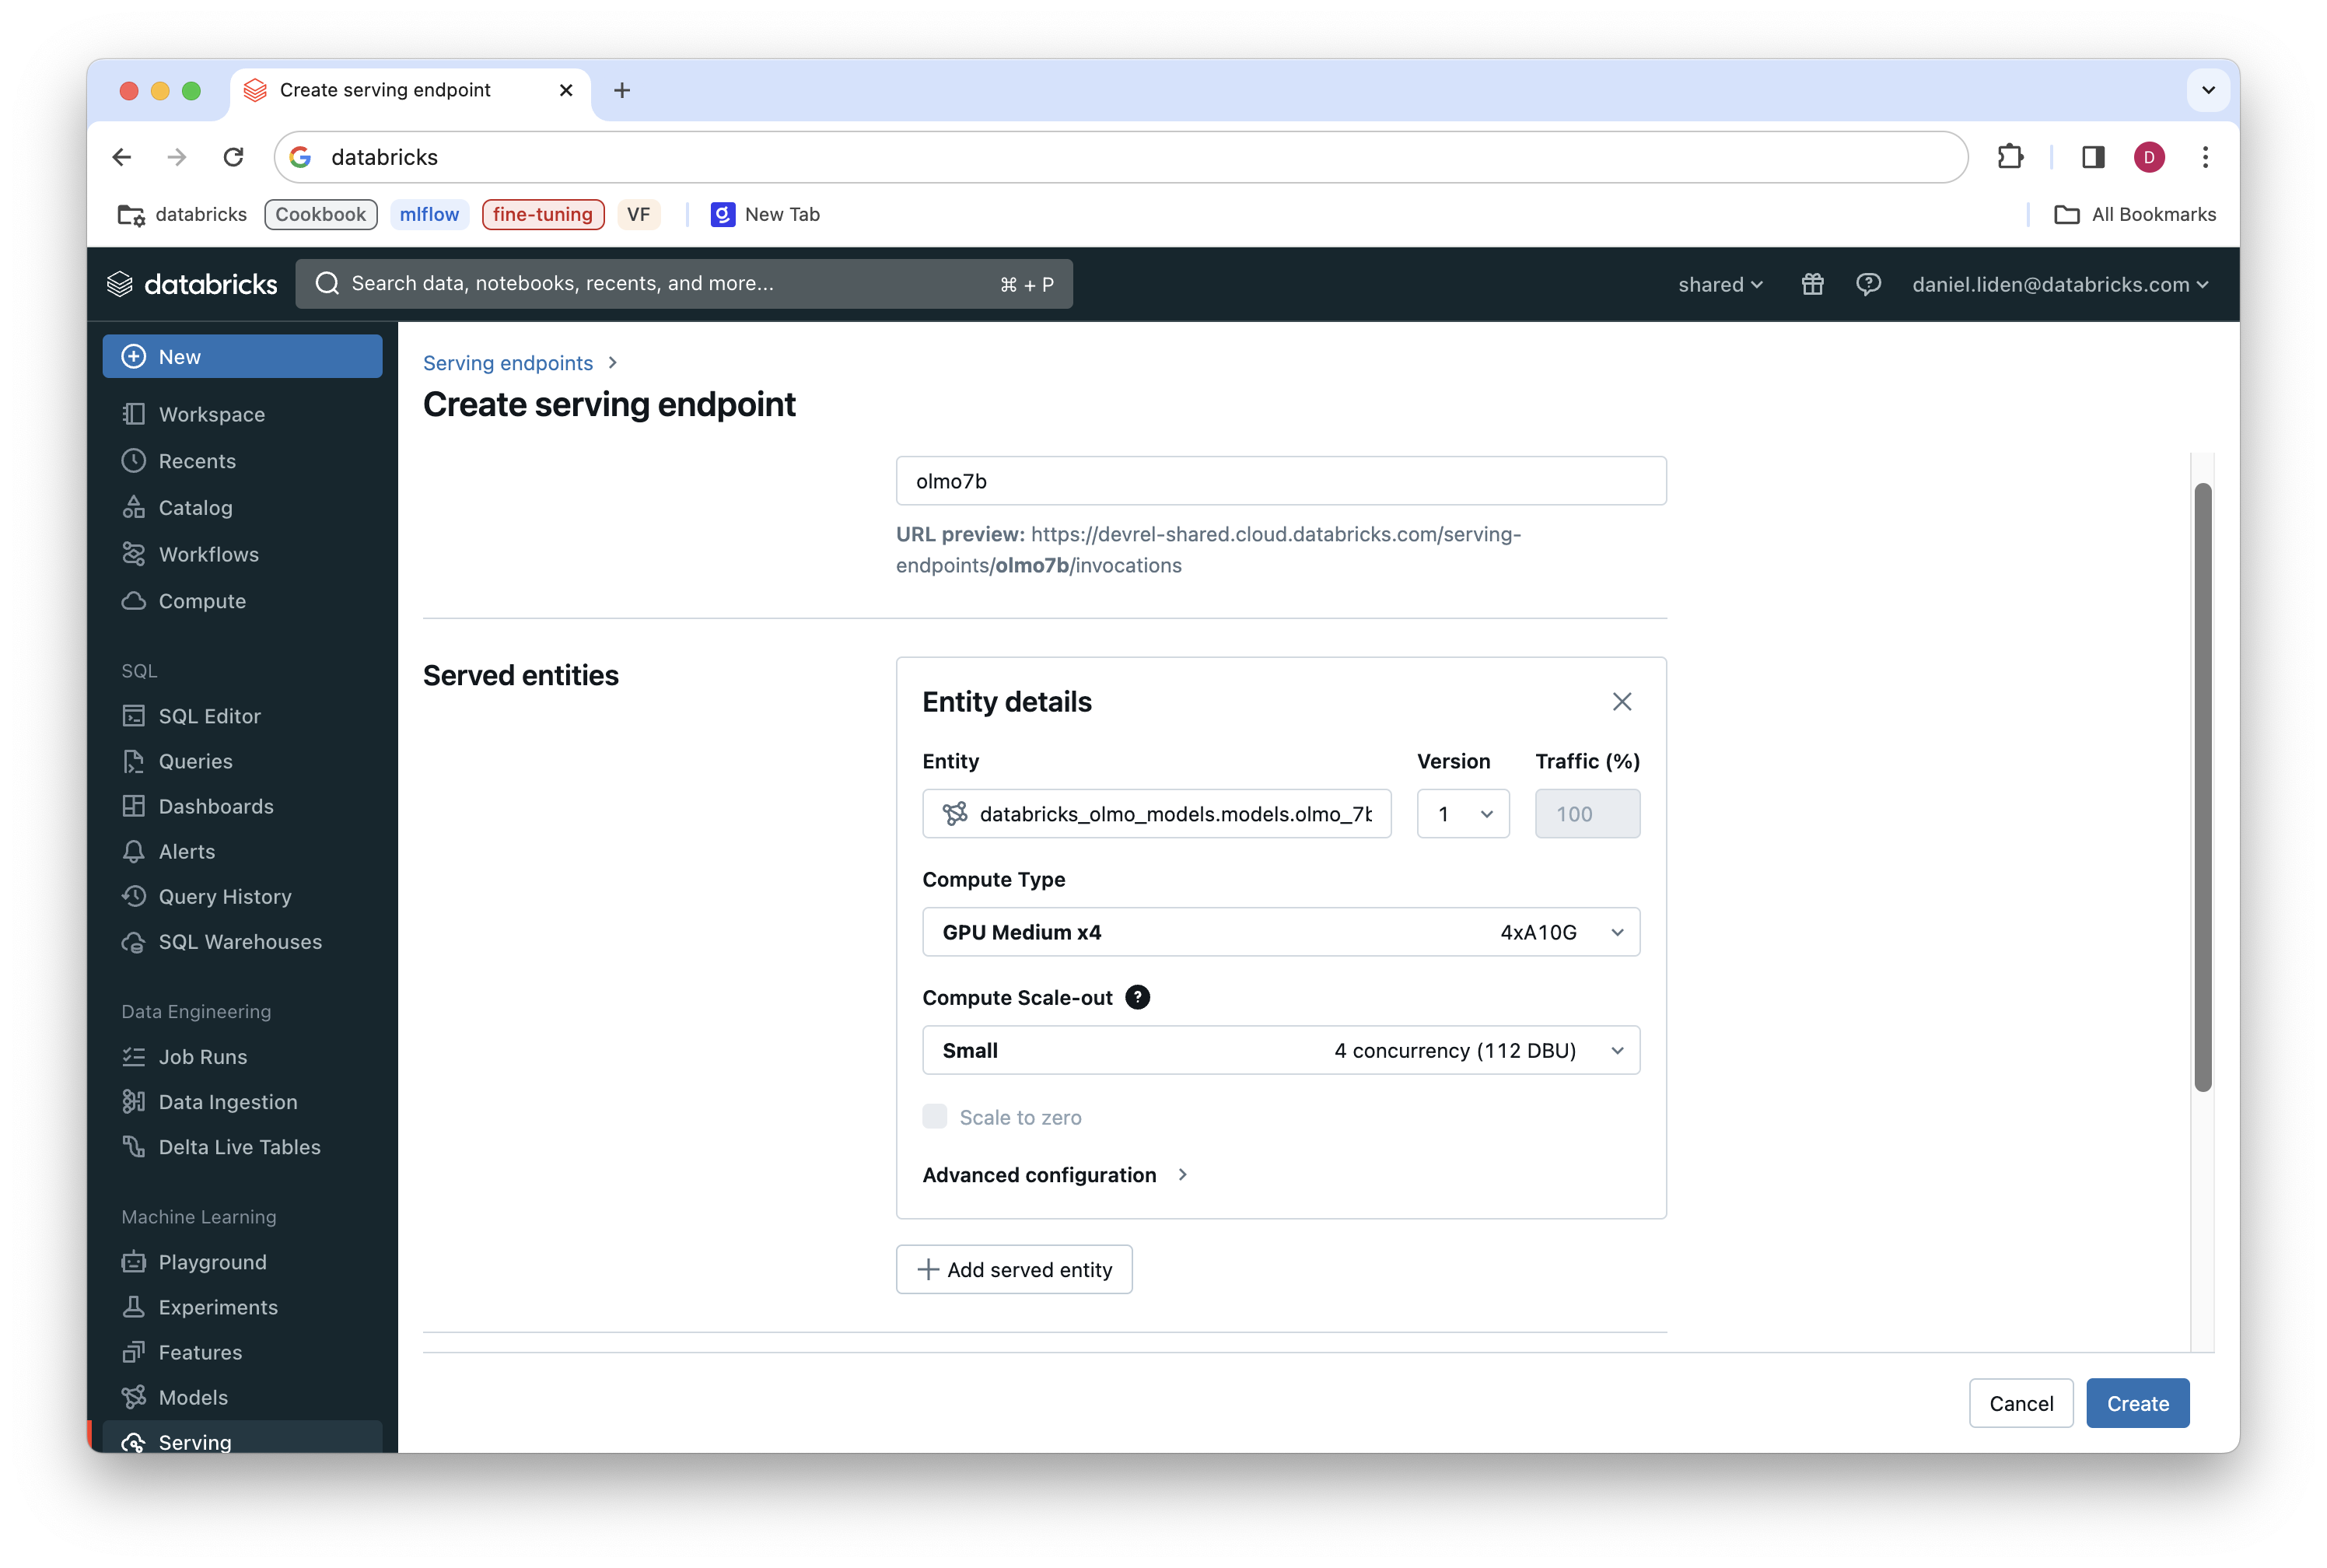
This will bring you to the “Create serving endpoint” page, where you have a few options for configuring your model serving endpoint. We’ll go with the following for this example:
Name:
olmo7bCompute type:
GPU Medium x4(this will provide enough GPU resources to load the model and minimize latency)Compute Scale-out:
Small(we are configuring this for testing and do not expect high concurrent usage)
Once you’ve selected the options, click “Create”.
Creating the model serving endpoint will take some time—a good chance to stretch your legs, have lunch, or make another cup of coffee.
Now the model is ready to go! Read more here on how to query your endpoint.
See Also#
Some models are available instantly via Databricks Foundation Model API. This notebook shows how to get started with the Foundation Model API without needing to configure your own model serving endpoint.